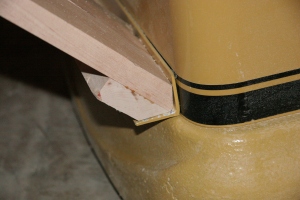
A few years back I decided it was time to upgrade my table saw with a new outfeed table. I’d been limping around with the original outfeed table I had made shortly after purchasing the saw. At that time my setup looked like this:
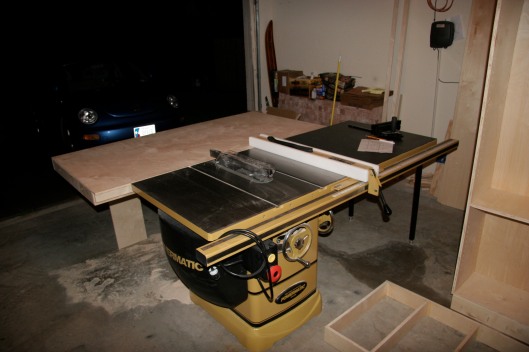
This was functional, but kludgy. There were a couple of key problems I needed to solve:
- The Powermatic PM2000 table saw comes with wheels that can be extended to move the saw around the shop which could not be done without detaching the outfeed table
- There were no miter slots in the outfeed table, so anytime I wanted to use my miter fence, I had to remove the outfeed table.
- The outfeed table was too large.
So, I started googling around for inspiration and found the following sites to be very interesting:
These had all solved the portability issue by making the table an integral part of the saw. In addition they all provided miter extension slots. The only thing I wanted to avoid was the use of a 5′ piece of aluminum angle as a support — it just did not look all that solid. So, after thinking about this a while I came to the conclusion that since the base of the table saw was the most stable part of the saw, if I could arrange to transfer all the weight of the outfeed table to the base of the saw it would be very stable. After playing around in Google’s SketchUp for a while I arrived at the following:
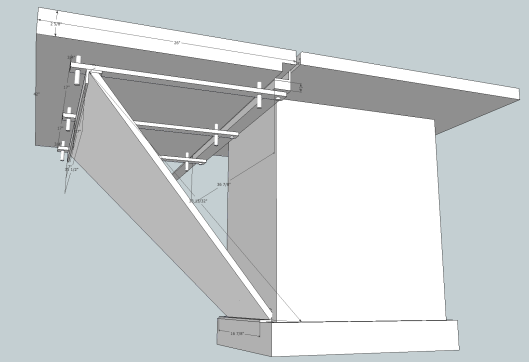
This design is composed of three parts
- The outfeed table
- A metal frame to allow leveling of the table with the saw
- A support extending up from base of saw to metal frame to provide support.
The resulting design resolved all my issues. Being an integral part of the saw, it would move with the saw without any problems. It was also smaller, but large enough to provide support when cutting plywood. And finally, I could add miter extension slots to the outfeed table.
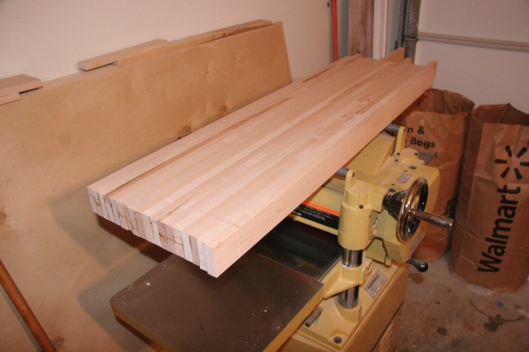
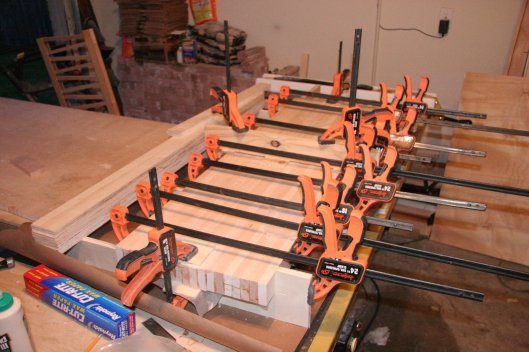
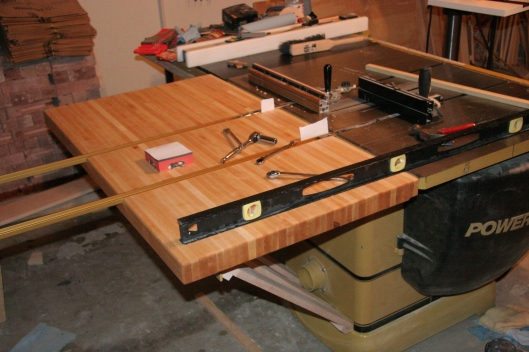
I purchased hard white maple for the outfeed table top, and cut all the pieces to the same width and approximate length. Since the table was about 2 feet wide, I was going to have to glue up the table pieces in sections. To ensure that each section was straight I constructed a jig to use as the backing to hold the boards straight. I also used a foam roller to apply the glue to speed up the glue up. Here is an example of how each section was glued:
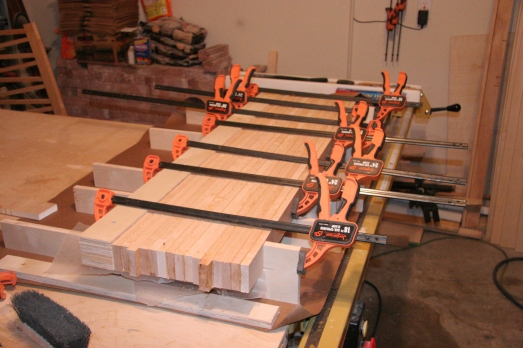
After gluing, I ran each section through the planer to remove excess glue and to ensure a uniform thickness:
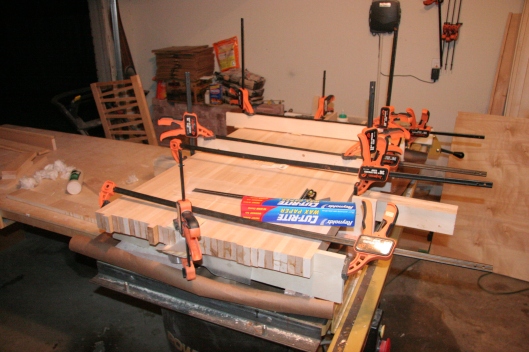
Then I glued two sections together to form a larger section:
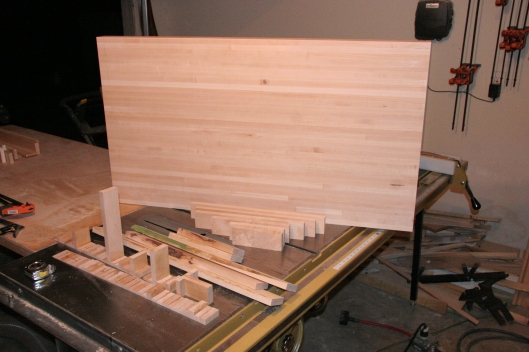
The larger sections were then run through the planer again before gluing the two large sections together to form the table:
The resulting table was too large for my planer (15″ capacity) so I used the orbital sander to cleanup the excess glue. Then after cutting the table to size I ended up with the following (including all waste):
With the table ready it was time to build the frame. I used 1/2″ metal stock which was then painted Powermatic Gold. I’ll spare you the details of the frame build and just show you the result:
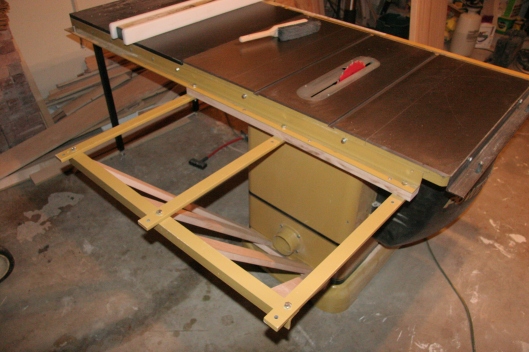
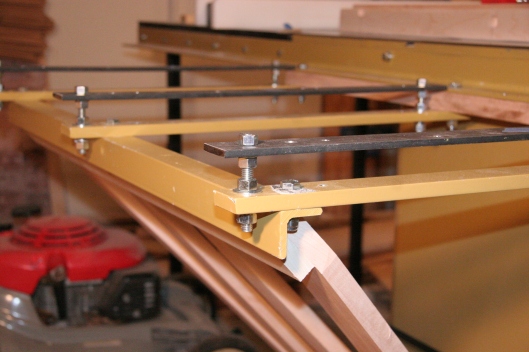
The frame was designed allow the outfeed table height to be adjustable so that it could be perfectly aligned with the top of the table saw:
I opted for a more open look for the frame support — also made out of hard white maple:
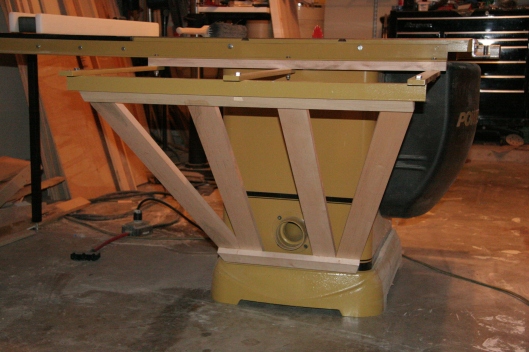
Note that the frame is held in place by two pieces of angle iron. One at the base of the table saw and another on the frame:
After cutting the miter slots, mounting the leveling brackets to the bottom of the outfeed table, and attaching to the frame, here is the result:
In this picture I’m in the process of leveling the table, and shimming the miter slots (using sheets of paper) to match up perfectly with the table saw slots. After cutting off the excess length from the miter slot bars, and filing the edges to match the rounded edges of the outfeed table, here is the end result ready for use:

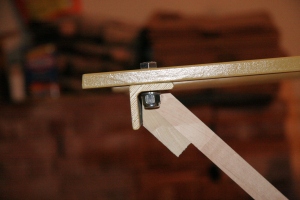
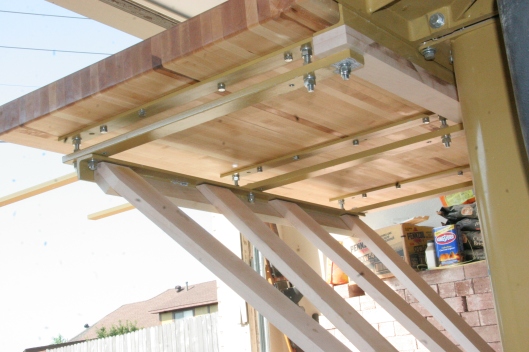
And for anyone interested, here is a shot of the underside of the table showing how the table is mounted to the frame and the leveling bolts:
This has been a great addition to my shop! After using this for about three years there are a few things about the design I would like to point out:
- The outfeed table is very stable. Transferring all the weight of the table to the base proved to be the right call.
- There support does not interfere with any activities going on around the base of the saw. It’s very easy to cleanup around the base of the saw.
- The saw was recently moved from Texas to Utah and after the move everything was still perfectly aligned.
- I purposely left space between the frame and the edges of the outfeed table so I could use it as a workspace. I’m always clamping things down on the table to work on.
At one time I was considering adding a fold-down extension to this table for really long cuts. I’ve found that I’ve never made a cut that needed any more extension space.